How to Configure Secure LDAP for Azure AD Domain Services
Azure Active Directory Domain Services (AD DS) is a cloud-based managed domain service that provides domain join, group policy, and lightweight directory access protocol (LDAP) capabilities to your environment.
Azure AD DS ensures security while simplifying user identity and access management for IT departments by reducing their infrastructure footprint. In conjunction with Azure AD, it can be used for external SaaS applications (e.g., Microsoft 365 & Azure portal) plus internal applications on your network or intranet.
When storing this confidential information, Azure AD DS’s support of LDAPS (Secure Lightweight Directory Access Protocol) is highly important; hence the following short guide to configuring LDAPS for Azure AD DS.
Create a digital certificate
Digital certificates are used to encrypt communication.
Create a certificate for secure LDAP access and apply it to your managed domain so the LDP.exe tool can query data with the secure and encrypted communication.
To create a certificate, open a PowerShell window as an Administrator. Next, enter the below commands, replacing $dnsName with your own DNS name.
-
Define your own DNS name used by your managed domain:
$dnsName="aaddscontoso.com"
-
Get the current date to set a one-year expiration:
$lifetime=Get-Date
-
Create a self-signed certificate for use with Azure AD DS:
New-SelfSignedCertificate -Subject *.$dnsName `-NotAfter $lifetime.AddDays(365) -KeyUsage DigitalSignature, KeyEncipherment `-Type SSLServerAuthentication -DnsName *.$dnsName, $dnsName
Export your digital certificate
To use your digital certificate, export it to a .PFX file. While exporting the certificate, include the private key by selecting “Yes, export the private key.” If it is not included, you will be unable to create a secure LDAP.
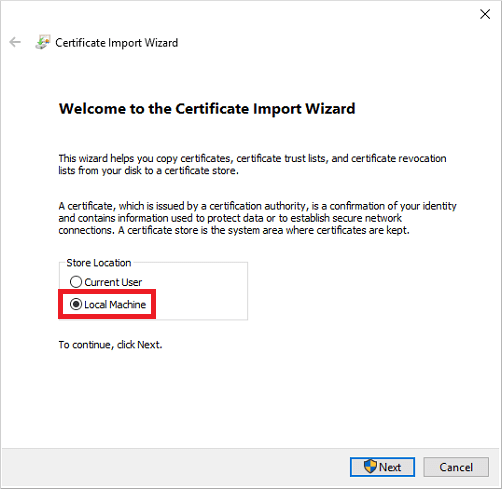
After the initial export, export the certificate again for client computers, so they can encrypt the data that was decrypted by Azure AD DS. Utilize a .CER file to install the export on the local computer with the Certificate Import Wizard. Upon successful importation of the certificate, a confirmation dialog will appear.

Enable secure LDAP
Following certificate importation, enable secure LDAP on your managed domain. In the Azure portal, locate AD DS and select your managed domain, then toggle “Secure LDAP” to Enable. Next, toggle “Allow secure LDAP access over the internet” to Enable, then select the .PFX certificate file you exported earlier.
Security settings
Enabling secure LDAP access over the internet leaves you vulnerable, so we recommend restricting access to known IP addresses. Locate “Resource groups” in the Azure portal, then select your resource and network security groups. Finally, select “Inbound security rules” in Settings and add a rule allowing TCP port 636.
Final steps
After enabling secure LDAP access over the internet, update the DNS zone so client computers can locate the managed domain. In the Properties tab, locate the secure LDAP external IP address and add the IP in your host file. Use the LDP.exe tool included in the Remote Server Administration Tools (RSAT) package to connect to your managed domain over LDAP. Next, bind to your managed domain by accessing the Connection menu. Select “Bind”, provide the user account credentials of the managed domain, then set the bind type to “Bind with credentials”.
Trusted Tech Team is an accredited Microsoft CSP Direct Bill Partner, carrying multiple Solutions Partner designations and the now-legacy Microsoft Gold Partner competency. Based in Irvine, California, we report trends affecting IT pros everywhere.
If your organization uses Microsoft 365 or Azure, you may be eligible to receive a complimentary savings report from a Trusted Tech Team Licensing Engineer. Click here to schedule a consultation with our team now to learn how much you can save today.
Subscribe to the Trusted Tech Team Blog
Get the latest posts delivered right to your inbox

